Friday, May 31, 2013

Skin Care For The Lazy Ones

Hello everyone!

If you are familiar with my blog, you know I'm not the skin care expert and I don't use a lot of products on my skin and that's why I felt a little bad that I don't give it proper care.
Since I'm not the creature with a morning/night routine using specific products every single day, I'll tell you how I (at least think :D) take care of my skin without it being a whole process you need to get used to.

I personally don't feel like I need a lot of products to make my skin better. I'm one of the lucky ones who never had problems with acne or so, so even if I'm using something it's not like "oh wow this product is helping my skin a lot".

2 in 1 - Makeup Remover + Cleanser
I think finding a good makeup remover is crucial. When I started using a makeup remover that was also a cleanser I noticed that my skin was never irritated, never felt weird, removing my makeup was very very refreshing. And since you are already removing your makeup, isn't it better to cleanse it at the same time? Of course it is :D Not only that you're not wasting more time, I'd say it's also cheaper like this. Also, while I was using Dermacol's Perfect Cleanser (or Elixir Lotion, on the pic), I used it also on days when I didn't need to remove any makeup. It just feels soooo damn amazing and refreshing. That's the key to skin care in my opinion - you need to sort of fall in love with the product, that's what will keep you using it.

Cleansing Wipes
I started using wipes a couple of weeks ago everytime after I remover my makeup because I felt like my skin didn't get proper care. It's not like it looked bad, I feel like it was "peer pressure" that got me hooked on this :D You see it everywhere, everyone is using so many skin care products... So I thought I'd try cleansing wipes. And I have to say I kinda like it. Again, it's refreshing, and I found cheap wipes with salicylic acid which is good for exfoliation.

Alright, these are two small tips that I can give you so far. I know you probably knew about these, but I know I'm not the only one out there, who doesn't have a skin care routine or so.
If you have any other tips, let me know in the comments! =) Or you can just write what skin care products you use =)

Thank you for reading! =)
Lena

Wednesday, May 29, 2013

Bronze and Naked [MAKEUP TUTORIAL] - featuring NAKED, NAKED 2 palettes by UD


Hi everyone!
I decided to post this tutorial at last. I filmed this what seems like a long time ago. It was more than a month ago. But with my technical difficulties I've had, I had to postpone uploading this one. The next tutorial that I'm going to upload is going to be more dramatic, so I decided, that after the last one, it's time for something a little more subtle.

I bought my Naked and Naked 2 palettes in London. Actually, there's a funny story behind purchasing the Naked 2. I had a hard time deciding if I wanted to buy the original one or 2, but I decided to go for the original one, because it had the sample of Primer Potion so even before going to London I decided to get the original one. It was probably after 10 minutes me and my friend were inside of our plane when my friend browsed through the magazine with the stuff they sell on the plane and she's like "isn't this the palette you wanted to buy??" It was the Naked 2 palette. And, of course, it was cheaper. I had a huge dilemma.. Because I really wanted the Primer Potion. But buying a cheaper Naked 2? A girl obsessed with makeup like me cannot say no to that :D And then when I went to Debenhams, I decided to buy the original one too (moreover, they had 10% off all UD products! :D Lucky day!). And I'm really happy I did. I think the two palettes complement each other very well.

Okay let's move on to the tutorial. I wanted to do something quick and a little different than what I'm used to. But I have to say, even though I never really wear bronze eyeshadows and neutrals a lot, I'm satisfied with the result. I don't know if this is everyone's cup of tea, but I really like how the colorful eyebrows complement the natural colors on the eyes.


THE LIST OF PRODUCTS:
Naked, Naked 2 palettes - eyeshadows:
Snakebite, Naked, Tease, Virgin, Sidecar
Sephora mono eyeshadow in Porcelain
MAC's Sheer blush in Breath of Plum
Revlon Kissable Balmstain in Honey


So I hope you enjoyed this for a change, my next tutorial is hopefully going to be up some time next week, do definitely stay tuned! =) You can subscribe to my channel, follow me on facebook and twitter =)

Wednesday, May 22, 2013

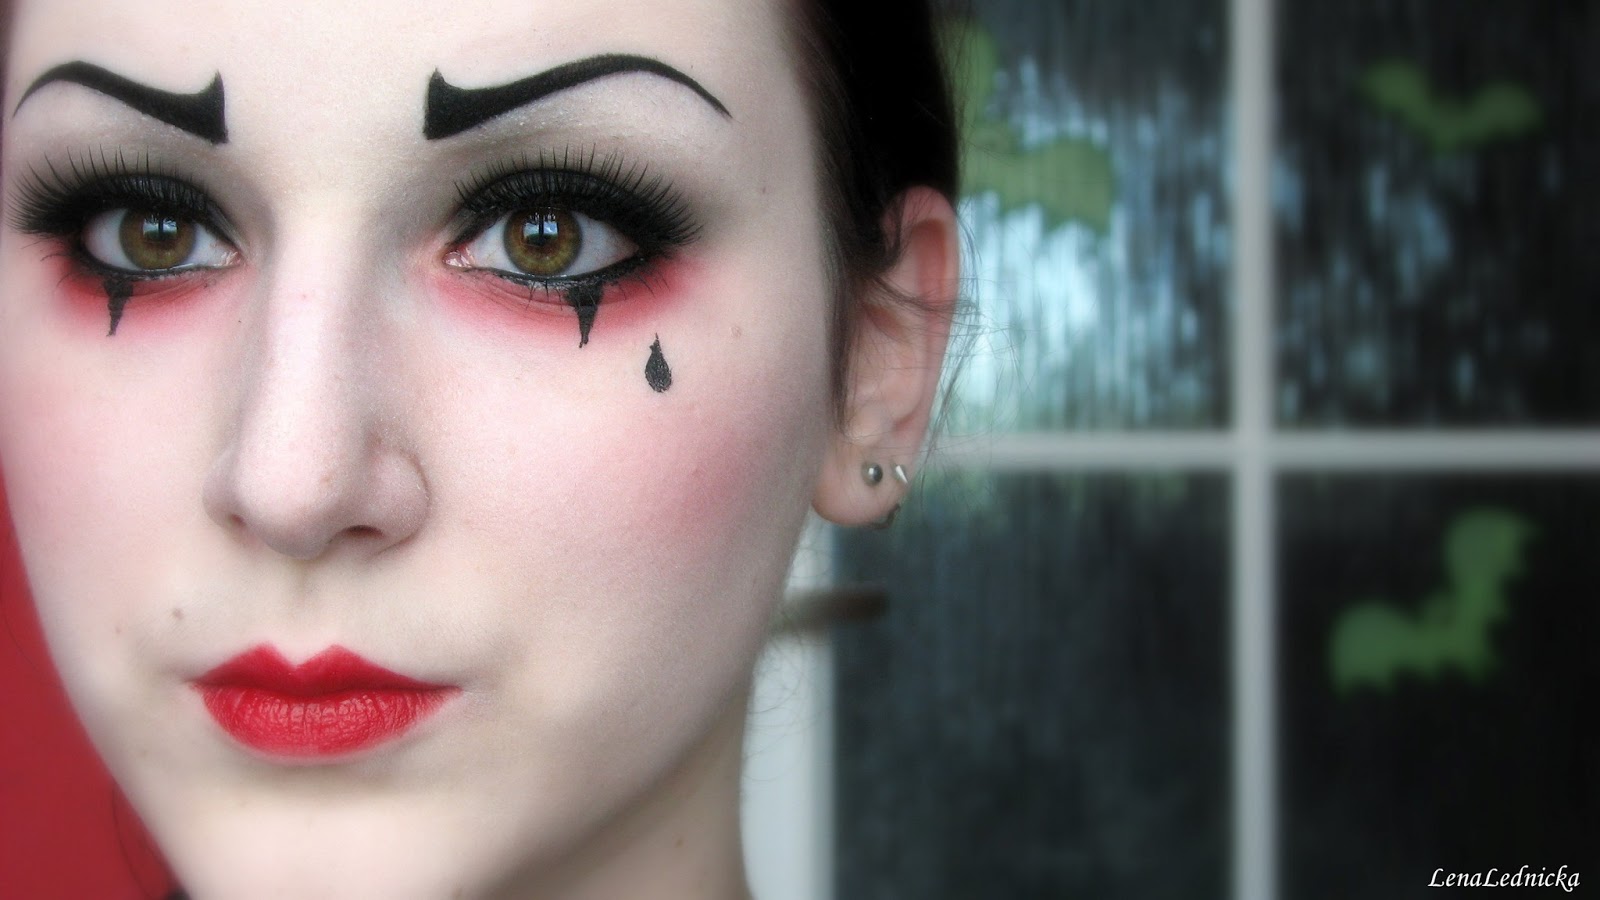
Pierrot the Clown [MAKEUP TUTORIAL]


Hey everyone! =)

I'm here with something a little different. I was inspired by Placebo's awesome song called Pierrot the Clown (hence the title of the tutorial).

At first I thought I was going for something complettely different but that's what I love about doing makeup tutorials, I never really know where I'm going with it or even if I do, I spontaneously end up doing something else. But I have to say I quite like how it turned out =)

As you can see, the eyebrows really add to that whole sad look. That's the thing about eyebrows. They can change up your entire face and the way you look. And that's one of the reasons I love that I shave my eyebrows. I can do whatEVER I want =) Especially with these sort of costume looks, I always struggled when doing my makeup because my eyebrows were just in the way. Btw - I'm not saying that you should go ahead and shave your eyebrows just do to one halloween makeup look on yourself :D Nope. It's a big commitment, because then you have to draw them everyday you get out of the house, if you don't want to look like an eyebrow-less alien :D


THE LIST OF PRODUCTS:
face paint - white Supracolor by Kryolan
red and black from the 120 palette
white from Sleek's Matte v2 palette
Oriflame lipstick in Hollywood Red


If you have any requests please let me know =) You can contact me here by dropping a comment or you can find me on facebook and twitter. And also, don't forget to subscribe to my youtube channel =)
So, thank you for checking out my tutorial, and I'll see you soon, bye =)
Lena

Tuesday, May 21, 2013

Night Mist [TUTORIAL]


Hey everyone!

Here is my new tutorial of a look that I recently did. I used the awesome Vice palette by Urban Decay. I got it recently on a trip in London and I wanted to create a look with ti ever since, but I sort of never got to it. But that has changed, here's one of the first looks that I did with this palette. =)

I decided to do something a little different (I didn't line my lower lashline with liquid eyeliner, so for me that huge :D) but I liked how it turned out. I love the colors, especially the blue, which turns out matte on your eyes, while it looks shimmery in the palette - which is just great.


>>WATCH THE VIDEO HERE<<


THE LIST OF PRODUCTS:
Urban Decay Vice Palette - colors Noise (pink), Vice (purple), Chaos (blue)


Sleek iDivine palette ultra mattes darks - colors Pillow Talk (white) and Noir (black)


Revlon JustBitten Kissable balmstain in Honey
Revlon JustBitten Kissable lipstain in Beloved

NYC Cheek Glow in West Side Wine
MAC Sheer Blush in Breath of Plum


PHOTOS:


So I hope you liked this makeup look, don't forget to check out my youtube channel for more tutorials, and you can also follow me on facebook and twitter if you want fresh updates =)

Bye! =)
Lena

Tuesday, April 23, 2013

Technical Difficulties + UPDATE!

Hi everyone,
I thought I should write a short article about what's going on at the moment.
If you follow me on facebook, you alreaday know that my laptop died a few weeks ago. I was just in the middle of editing a tutorial and everything started to be very slow so I decided to shut it down, let the poor guy cool down and try it later. Well, it never turned back on.
I was worried all my data including my tutorials and photos are gone. Luckily, the technician said the disk is okay. But the laptop is not. My motherboard decided to go on a strike and repairing it may not even help the problem, I'd have to probably get a new one, which costs almost as much as a new laptop. Great. Oh, and did I mention that the warranty expired at the beginning of the year?
So now I'm using my small shitty netbook which I used only for school (for typing down notes on lectures and so on) so I didn't mind that it's slow, that I can't really install anything there.. I only needed a place to open docs and pdfs and an internet browser.. I can't install any of the editing software for the tutorials or photos so I feel like someone cut off my hands ... I really miss filming and editing... :((
Luckily, I'll be able to have a "new" laptop at the beginning of May, so I'll be definitely posting a new tutorial once I get my hands on it.
I really am sorry for being so inactive.. But I'll do my best to upload as often as possible from May.
I have three tutorials stuck in my old disk and one that I filmed just recently that I may be able to edit on someone else's laptop but I think I'm just going to wait till I get my own.
It's horrible how we are dependent on technology these days.. Everything I ever created is in that laptop.. I'm currently working on some essays for school and it's not fun doing it on the smallest netbook ever ... The LCD is around 8"...
If you want more updates about my technology crisis, follow me on facebook, where I always post what's new =)
Hope your laptops never do the same to you! :D
Lena

Sunday, March 31, 2013

Review & Preview: Drugstore Mascaras - Maybelline One by One Volum' Express


Hey everyone!
I'm here with a new series that I'm starting on my channel. It's called Review & Preview and as you can tell by the name of it, I'll be doing a small review about a product, so I'll tell you what I think about it and I'll also show you how I use it.
I decided to start first with drugstore mascaras. There's a huge variety of mascaras in the drugstores. Good, bad ones, cheap, expensive ones. But it's not a rule that a cheap mascara has to be bad, or that an expensive one is good.
Mascaras aren't one fit for all. It's the same as with your hair. We all have different hair, so we use different shampoos, conditioners and styling products according to our hair type and needs. Someone's lashes need a wet formula, some need a dry one. It's all about finding what works best for you.
I'm going to show you how different mascaras work on me and I can tell you small tips how to work with them.
I also want to show you, that you don't need to spend 20 or more dollars on a mascara. There are tons of good ones in the drugstore and some people are afraid that if they pay less than 5 dollars, it's definitely going to suck.

Today I'm starting with Maybelline's One by one Volum' Express mascara. I'm currently using it and I'm very satisfied with it. I love the wand because it's rubberized and that's what my lashes like the most. I feel like you can get away with using just this mascara (I usually use 2 mascaras because if you combine two different formulas, you can get a better result, I'm currently using one by one, I do my second coat with Astor's Look Out, and I go back in with the One by one so I separate my lashes even more), because with 2 coats, you can get thicker lashes since you're putting on more product and if you roll the mascara (I show you how I do that in the video) you can lift you lashes so they look longer.


PROS:
- separates lashes awesomely
- gives thickness with second coat
- gives you lenght

CONS:
- price (I know 200 CZK isn't still a bad price for a mascara but if I had to pay full price for it, I'm not sure if I'd get it because I feel like it's sort of a lot if you have no idea if it's going to work for you)
- to get the full/better effect, you need to apply two coats - this can be a a small problem for some girls, I only got into the habit of applying more than one coat just recently because I felt like I was wasting my time or I simply forgot

WOULD I REPURCHASE IT?
Definitely =) (even for pull price now that I know it really works for me)


If you're interested in any other products that you'd like to see a review on, don't hesitate to contact me. I already have a few other mascaras prepared for a review, so if you don't want to miss them out, subscribe to my yt channel =)

Thanks a lot for watching! =) See you next time, bye =)
Lena

Monday, March 18, 2013

Tim Burton's Queen of Hearts [TUTORIAL] + My Outfit!


Hi everyone! =)
I'm finally here with a new tutorial. I know I posted the last one exactly a month ago, so many things managed to happen during that month but I hope I'll be able to post at least one video in 2 weeks.

This video is very special. I dressed up as Tim Burton's Queen of Hearts for one costume party. I already went as QoH cca two years ago for Tim Burton's Night and back then I wasn't filming tutorials yet. This time it was easier for me, because I more makeup and tools and I don't have any eyebrows anymore. I actually used the gluestick method to cover them two years ago.

I hope you like this. I just love costume parties. You can be creative as hell =)


THE LIST OF PRODUCTS:
Kryolan Supra color in White
Revlon matte eyeshadow in Venetian Blue
essence liquid ink eyeliner
Maybelline One By One Volum' Express in Satin Black
Kryolan Translucent Powder in TL1
 
Oriflame lip liner and lipstick from the Hollywood line

Here's another photo of my outfit. Sorry, it's so cropped, it was hard to take these..


If you have any requests for a tutorial, just let me know! You can also find me on facebook http://www.facebook.com/lednicka.lena and on twitter @LenaLednicka. Thanks for watching, bye! =)
Lena